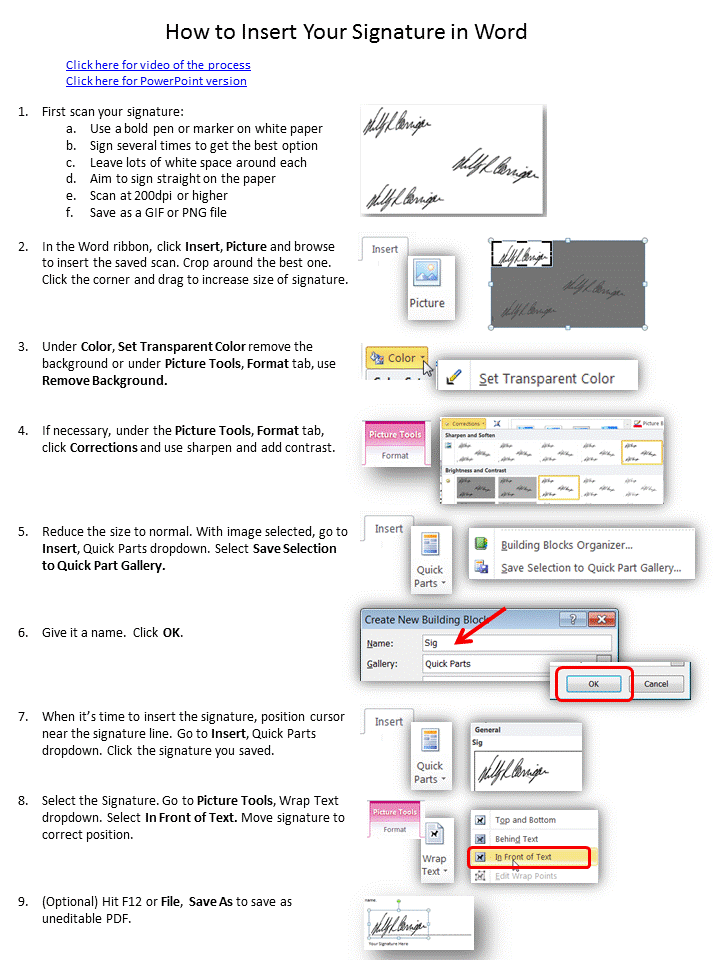
1.First scan your signature:
a. Use a bold pen or marker on white
paper
b. Sign several times to get the best
option
c. Leave lots of white space around
each
d. Aim to sign straight on the paper
e. Scan at 200dpi or higher
f. Save as a GIF or PNG file
2.In the Word ribbon, click Insert, Picture and browse to insert the saved scan. Crop around the best one. Click the corner and drag to increase size of signature.
3.Under Color, Set Transparent Color to remove the background or under Picture Tools, Format tab, use Remove Background.
4.If
necessary, under the Picture
Tools,
Format tab, click Corrections and
use sharpen
and add contrast.
5.Reduce the size to normal. With image selected, go to Insert, Quick Parts dropdown. Select Save Selection to Quick Part Gallery.
6.Give it a name. Click OK.
7.When it’s time to insert the signature, position cursor near the signature line. Go to Insert, Quick Parts dropdown. Click the signature you saved.
8.Select the Signature. Go to Picture Tools, Wrap Text dropdown. Select In Front of Text. Move signature to correct position.
9. (Optional) Hit F12 or File, Save As to save as uneditable PDF.

No comments:
Post a Comment