Search This Blog

Thursday, December 11, 2014

How to find your computer name or IP address


Visit the Trainer Lori YouTube channel for free video tutorials!

Here is a quick and easy way to see both your computer name and IP address.
 
1. Open the system tray by clicking the arrow (in the bottom right corner).

2. Hover over the red and green Who is Connected icon. It looks like two computer screens.
 
3. The Computer name will appear on top and the IP address will appear second.

Mysterious Excel watermark

Visit the Trainer Lori YouTube channel for free video tutorials!

If a watermark mysteriously appears when printing in Excel and you didn’t create it, check the printer properties.
 
1. On the Excel ribbon, click File, Print, Printer Properties.
 
2. On the Advanced tab, look for plug-ins Watermark... (if it is not there, this is not your fix!)
 
3. Click the Watermark... button.  The Watermark dialog box opens.
4.Under Select watermark, select None.
 
5. Click OK.

How to Zip Files in Windows 7

Visit the Trainer Lori YouTube channel for free video tutorials!


In Windows 7, compress files to email (or store) with the magical right click!
 
1. In Windows Explorer, select multiple files (Shift + click if they are contiguous or touching or Ctrl + click if they are not). 
 
2.Right click on them.  A menu opens.
 
3. Click Send to, Compressed (zipped) folder.
 
4. A new zipped file folder is created named after the last document in the list. 
 
5. Rename it if appropriate.


How to show a missing cursor

Visit the Trainer Lori YouTube channel for free video tutorials!

In Windows 7, if your cursor is missing (for example the insertion point disappears in Word), it’s easy to turn it back on.

Click the Start button. Search “mouse.” The Mouse Properties dialog box opens.

Under the Pointer Options tab, uncheck Hide pointer while typing. Click OK.

Internet Explorer Security - Active X Controls

Visit the Trainer Lori YouTube channel for free video tutorials!

In Internet Explorer, if you don’t want to have to choose to allow or deny required ActiveX controls from trusted websites, change it under Tools, Internet options. The Internet Options dialog box opens.
 
Under the Security tab, click Internet then Custom level...
A new dialog box opens: Security Settings - Internet Zone.  Ensure that you select Enable on each of the ActiveX control options.

Windows 7 Admin Rights

Visit the Trainer Lori YouTube channel for free video tutorials!

If you have Administrator Rights on your computer, but some applications act as if you don't then you need this quick fix.

In the Start Menu (click the Start button) when you see the application name, instead of clicking to open it, right mouse click on it.

A menu opens with the option to Run as administrator.  Click it. 

A dialog box opens asking Do you want the following program to make changes to this computer?  Click Yes to start the program.

Show file extension in Windows Explorer

Visit the Trainer Lori YouTube channel for free video tutorials!

When I open a file in Windows Explorer on the FTP drive to look at it (without making any changes), the file name seems to change when I close it.

I discovered t
he file name didn’t really change but the file extension (the information after the .) is no longer viewable.   

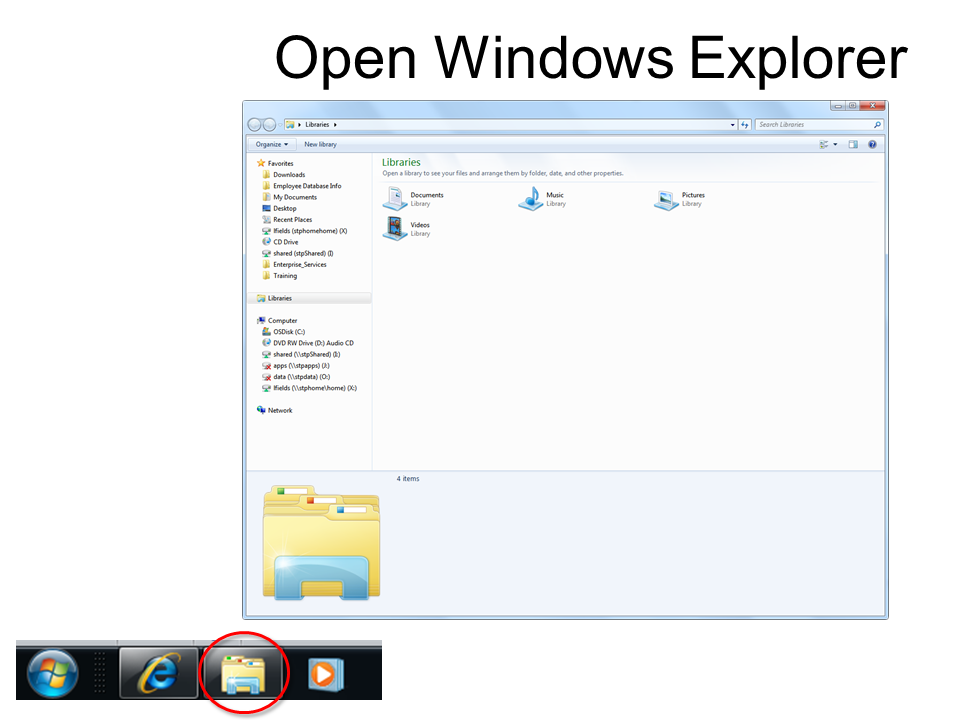
1. To fix it, open Windows Explorer.

2. Click Organize dropdown, Folder and search options.

3. A Folder Options window opens. Under the View tab, in Advanced settings, uncheck the Hide extensions for known file types.


Tuesday, December 9, 2014

How to Reduce Email in Outlook

Click here for video of the process


1.Empty deleted emails upon exit. Click File, Options, Advanced: Empty Deleted items folders when exiting Outlook.

2.Delete unneeded files fast.  First find unneeded emails.  Click Arrange By (also change order as needed):

Date – consider deleting emails older than 2 years old.

Size – look for emails that you don’t need in the Enormous and Huge range (also look for a string of similar Tiny emails to delete).

Attachments – announcements and duplicates can really increase your bloat.

Show as Conversations – look for redundant emails such as duplicates in threads.

3.In Sent Items, delete sent emails.  Especially look for large or out-of-date attachments that cause memory bloat. Also, take any graphics out of your signature (including logos)!

4.Delete unneeded future emails with Rules. To open, click File, Info, Manage Rules & Alerts.  Then click New Rule…  Consider global account emails that you don’t need and never read. Create a rule to move the item to folder: Deleted Items.

5.If items are archived, simply search in email as usual.  If it is not located, click the link Try searching again in All Mail Items.

6.Click Clean Up, Clean Up Folder on the Home tab and all conversations in the selected folder are reviewed, and redundant messages are deleted. CAUTION: If conversation threads have changed topic and the Subject line stays the same, these will also be deleted.  Best Practice: Change Subject line when the topic changes.

7.Click Assign Policy on the Home tab to select your own archive and retention policy. For example, use a rule to move all corporate announcements into a folder to read if you have time.  Set a retention policy on the folder to delete in one month.  If you don’t read the announcement within the month, it is deleted for you.

Visit the Trainer Lori YouTube channel for free video tutorials!

How to Recall a Sent Email in Outlook

For free training videos, visit the Trainer Lori YouTube channel!

If you send an email and discover it was a mistake, don't panic!  As quick as possible, use the Recall tool instead.

1.In Outlook, open Sent Items.

2.Find and open the sent email to recall.

3.In the Move group, click Actions command dropdown. (Depending on the size and resolution of your screen, the word Actions may not appear.)

4.Click Recall This Message
 
5. The Recall This Message dialog box opens. Select the options you desire.  If you want to be notified of the success or failure of each, select the Tell me if recall succeeds or fails for each recipient.

You will (eventually) get an email regarding recall success or failure for each recipient. Success is based on the fact that the recipient has not opened or moved the email before the recall is sent. 
6.Then click OK.

7.The sent email will now contain a message indicating you attempted to recall it.
 
8.The recipients may get a message stating that the email has been recalled.